Post by EightBitDragon on Jan 22, 2012 17:47:26 GMT -5
Here I'm going to show you how to place rings super easily (lazy) from within your 3D app. First, build your stage of course. Next, make a small cube, about the size of a ring (the scale doesn't really matter). You can use any shape to represent the rings, but a cube has fewer polygons and makes the file size smaller. Start copying this cube around your stage, placing them where you want rings.

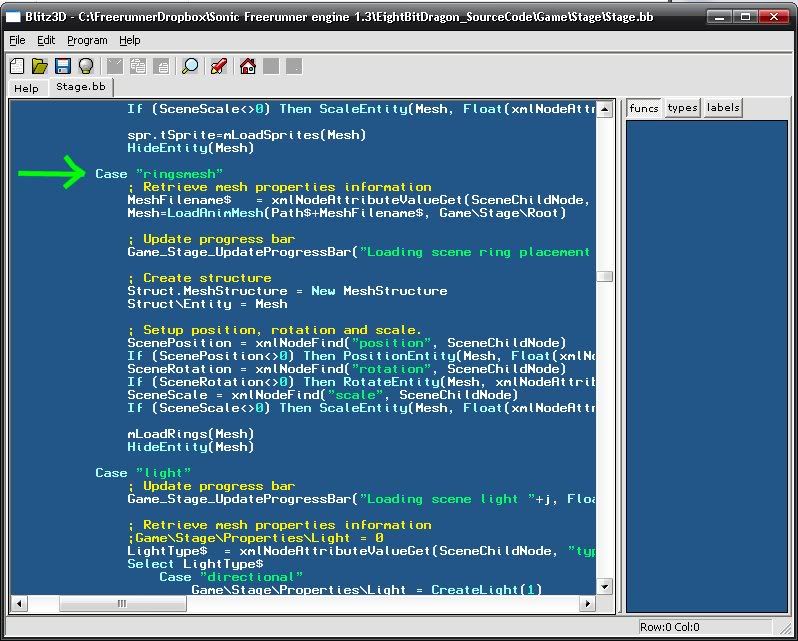
Next, add the following code to stage.bb just above the line that says Case "light".

Next add the following code to the very bottom of stage.bb.
Now comes the tricky part. You will have to export your stage and the ring objects as seperate models. The way this works is, the mesh containing all the boxes will be used for placing the rings. A ring will be placed at each box's location, and the boxes will be hidden from view.
How you do this, depends greatly on the 3D application you are using. In 3DS Max, you can simply hide objects from view, and the exporter will not export the hidden stuff.
If all else fails, save the whole stage two more times after you have finished editing it. Save one copy as "stage_rings" and the other as "stage_mesh". Open the one containing the rings and delete the stage mesh and export/save it. Open the one that contains the stage mesh and delete the boxes and export and save as usual.
Once you have 2 meshes, one containing only your stage, and one only containing the boxes, open the stage.xml and use the following lines to load the new mesh containing the rings.
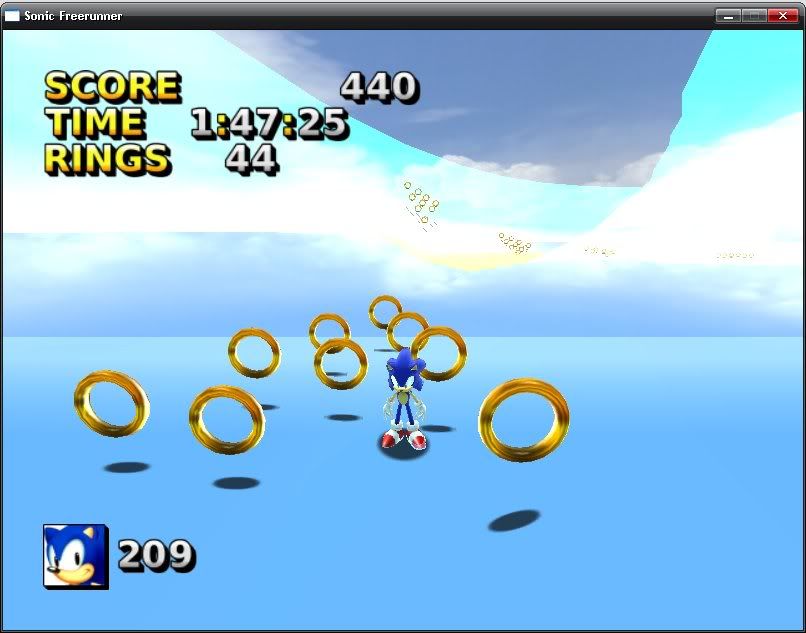
Now, when you load the stage, all the boxes will have been replaced by ring objects! This code assumes your stage is scaled by x1 but the mesh should be able to scale just as you can with the main stage.
This method can be very useful for placing complex ring formations that would otherwise be very difficult or impossible to create.

If you have any problems with this code, let me know so I can figure out a solution! If the images don't show up, just view them at this link. They aren't really necessary anyway: BlitzSonic Ring Placement Tutorial
*Tips:
-Be sure to export animation, even though the ring mesh has none. If you don't, the code will place all the rings at the center of the mesh!
-If you parent a group of rings to a single ring to make dragging a formation easier, be sure to break the parenting before exporting or only one ring will be placed at each formation!

Next, add the following code to stage.bb just above the line that says Case "light".
Case "ringsmesh"
	; Retrieve mesh properties information
	MeshFilename$	= xmlNodeAttributeValueGet(SceneChildNode, "filename")
	Mesh=LoadAnimMesh(Path$+MeshFilename$, Game\Stage\Root)

	; Update progress bar
	Game_Stage_UpdateProgressBar("Loading scene ring placement "+j+": "+MeshFilename$, Float#(j)/Float#(xmlNodeChildCount(RootChildNode)))

	; Create structure
	Struct.MeshStructure = New MeshStructure
	Struct\Entity = Mesh

	; Setup position, rotation and scale.
	ScenePosition = xmlNodeFind("position", SceneChildNode)
	If (ScenePosition<>0) Then PositionEntity(Mesh, Float(xmlNodeAttributeValueGet(ScenePosition, "x")), Float(xmlNodeAttributeValueGet(ScenePosition, "y")), Float(xmlNodeAttributeValueGet(ScenePosition, "z")))
	SceneRotation = xmlNodeFind("rotation", SceneChildNode)
	If (SceneRotation<>0) Then RotateEntity(Mesh, xmlNodeAttributeValueGet(SceneRotation, "pitch"), xmlNodeAttributeValueGet(SceneRotation, "yaw"), xmlNodeAttributeValueGet(SceneRotation, "roll"))
	SceneScale = xmlNodeFind("scale", SceneChildNode)
	If (SceneScale<>0) Then ScaleEntity(Mesh, Float(xmlNodeAttributeValueGet(SceneScale, "x")), Float(xmlNodeAttributeValueGet(SceneScale, "y")), Float(xmlNodeAttributeValueGet(SceneScale, "z")))

	mLoadRings(Mesh)
	HideEntity(Mesh)

Next add the following code to the very bottom of stage.bb.
;||||||||||||||||||||||||||||||||||||||||||||||||||||||||||||||||||
; mLoadRings places rings at child object locations within a mesh.
;||||||||||||||||||||||||||||||||||||||||||||||||||||||||||||||||||
Function mLoadRings(mesh)
	For i=1 To CountChildren(mesh)
	child = GetChild(mesh, i)

	positionX# = EntityX#(child, True)
	positionY# = EntityY#(child, True)
	positionZ# = EntityZ#(child, True)

	obj.tObject = Object_Ring_Create(positionX#, positionY#, positionZ#)
	Next
End Function
Now comes the tricky part. You will have to export your stage and the ring objects as seperate models. The way this works is, the mesh containing all the boxes will be used for placing the rings. A ring will be placed at each box's location, and the boxes will be hidden from view.
How you do this, depends greatly on the 3D application you are using. In 3DS Max, you can simply hide objects from view, and the exporter will not export the hidden stuff.
If all else fails, save the whole stage two more times after you have finished editing it. Save one copy as "stage_rings" and the other as "stage_mesh". Open the one containing the rings and delete the stage mesh and export/save it. Open the one that contains the stage mesh and delete the boxes and export and save as usual.
Once you have 2 meshes, one containing only your stage, and one only containing the boxes, open the stage.xml and use the following lines to load the new mesh containing the rings.
<ringsmesh filename="Stage/stage_rings.b3d">
		<position x="0.0" y="0.0" z="0.0"/>
</ringsmesh>
Now, when you load the stage, all the boxes will have been replaced by ring objects! This code assumes your stage is scaled by x1 but the mesh should be able to scale just as you can with the main stage.
This method can be very useful for placing complex ring formations that would otherwise be very difficult or impossible to create.

If you have any problems with this code, let me know so I can figure out a solution! If the images don't show up, just view them at this link. They aren't really necessary anyway: BlitzSonic Ring Placement Tutorial
*Tips:
-Be sure to export animation, even though the ring mesh has none. If you don't, the code will place all the rings at the center of the mesh!
-If you parent a group of rings to a single ring to make dragging a formation easier, be sure to break the parenting before exporting or only one ring will be placed at each formation!


